
Two super easy ways to propagate daylilies are dividing daylily clumps and growing new daylilies from seed.
Since daylilies do not come "true" from seed (the daylilies grown from seeds will not be identical to the parent plant and may, in fact, be very, very different), if you want to ensure that the new plants will be exactly the same as the parent plant, you'll need to divide the parent plant.
However, one of the really cool things about daylilies is the ability to create new colors, shapes, forms, and patterns by cross breeding them and growing new daylilies from seed. That's how new cultivars are created each year and it's really easy to do.
But, you don't have to be a daylily breeder to collect and grow daylilies from seed. Nature does a pretty good job by itself and, if not deadheaded after flowering, most daylilies will form seeds which you can collect and sow. You won't know what the flowers will look like for a few years, but growing daylilies from seed is a great way to increase the number of plants you have and it's a lot of fun to see how they turn out.
If you'd like to collect daylily seeds, be sure to NOT remove the spent flowers. Just let the flower fall off naturally... it should only take a few days to fall off. If the flower was pollinated, a seed pod will form where the flower was. It takes about 6-8 weeks for a daylily seed pod to develop fully.
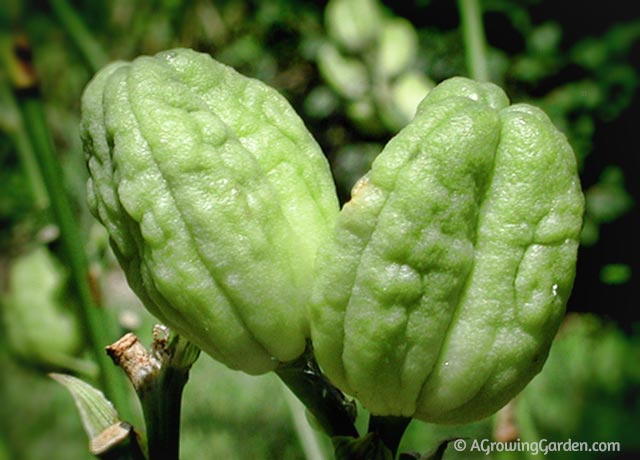
Immature seed pods are green and will continue to grow and swell as the seeds develop inside. Here is a photo of some immature daylily seed pods ... these are not ready to be harvested yet and should be left to mature:
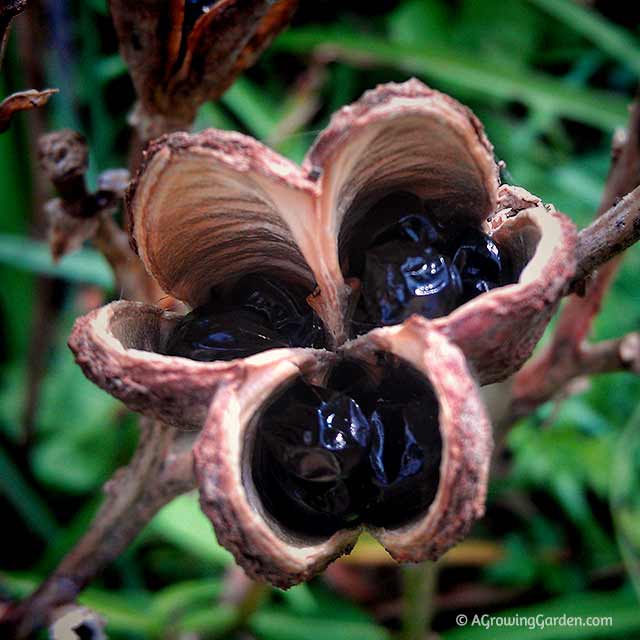
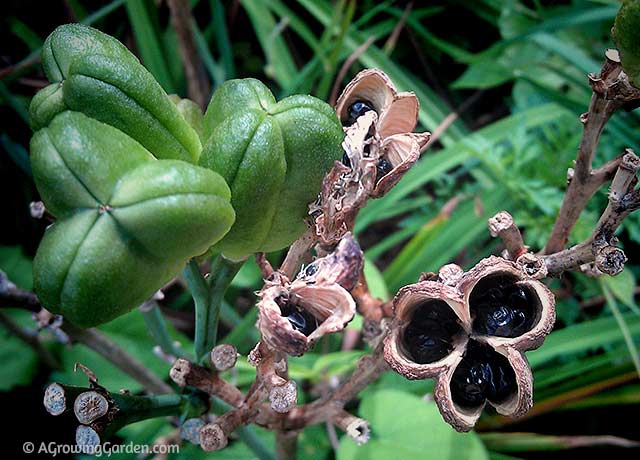
When the seed pods mature, they will start to open. And when the seed pod is fully mature, it will have become very brown and dry and will open fully to reveal the black, glossy seeds inside. As you can see in the photo below, there is a big difference between immature and mature seed pods. Here you can see immature, green seed pods (on the left) next to very mature, ready to harvest seed pods (on the right).
Don't try to harvest the seeds when the pods are still closed and really green... the seeds won't be ready. You need to wait at least until the seed pod starts to crack open on it's own. You don't necessarily need to wait until the pod completely drys out and fully opens though -- if you wait that long, the seeds might fall to the ground before you have a chance to harvest them!
I usually collect the seed pods as soon as they start to crack open (the seed pods are often still quite green at this stage, but once the pods start to open, the seeds should be glossy black and ready to harvest).
When I harvest daylily seeds, I pull the seed pod from the stem and put it into an open container. Then, after the pods have had time to completely dry out, I go through them and separate the seeds from the pods. I use separate containers for the seeds I have propagated/hybridized myself because I need to keep track of the parent plants for those. But for any mixed daylilies (those I don't know the parentage of), I pretty much just throw the seed pods together into a bucket. Here is one of the buckets I'm using this year to collect my mixed daylily seeds ... pretty fancy, huh?

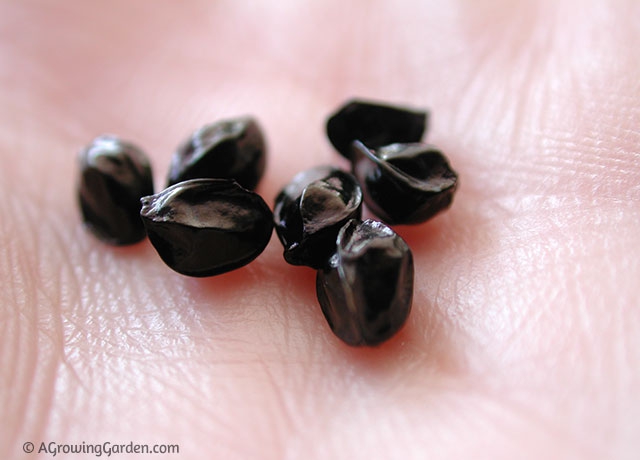
Some daylilies produce humungous seeds and other daylily seeds are much smaller, but no matter the size of the seed, pretty much all mature daylily seeds look like those in the photo below.
Once you've had a chance to separate the seeds from the pods, you can throw the empty pods into your compost and put the seeds into a ziplock bag or envelope until you are ready to plant them.


Join the Conversation!